


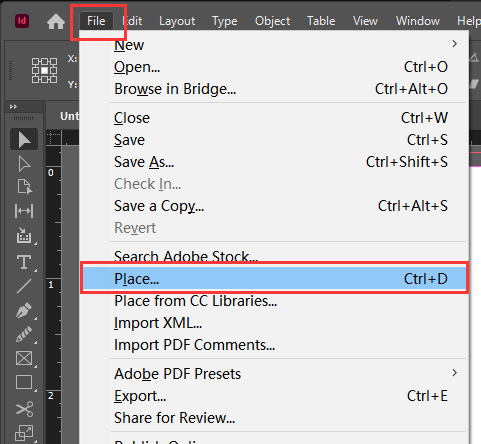
 4. In the new page, select “File”, then “Place”, choose the downloaded template, and check “Show import options”.
 5. In the “Place PDF” panel, select range 4.
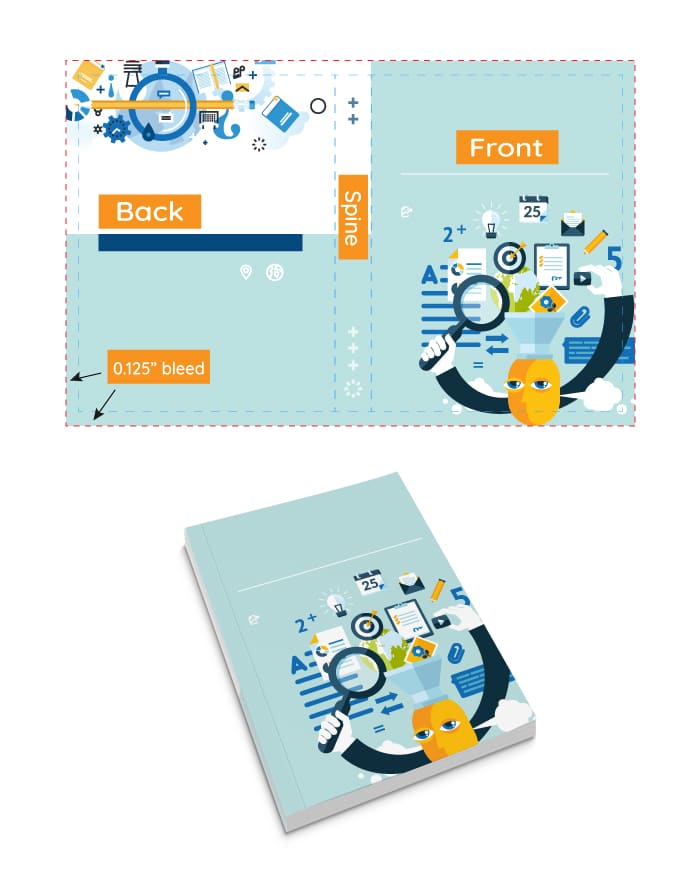
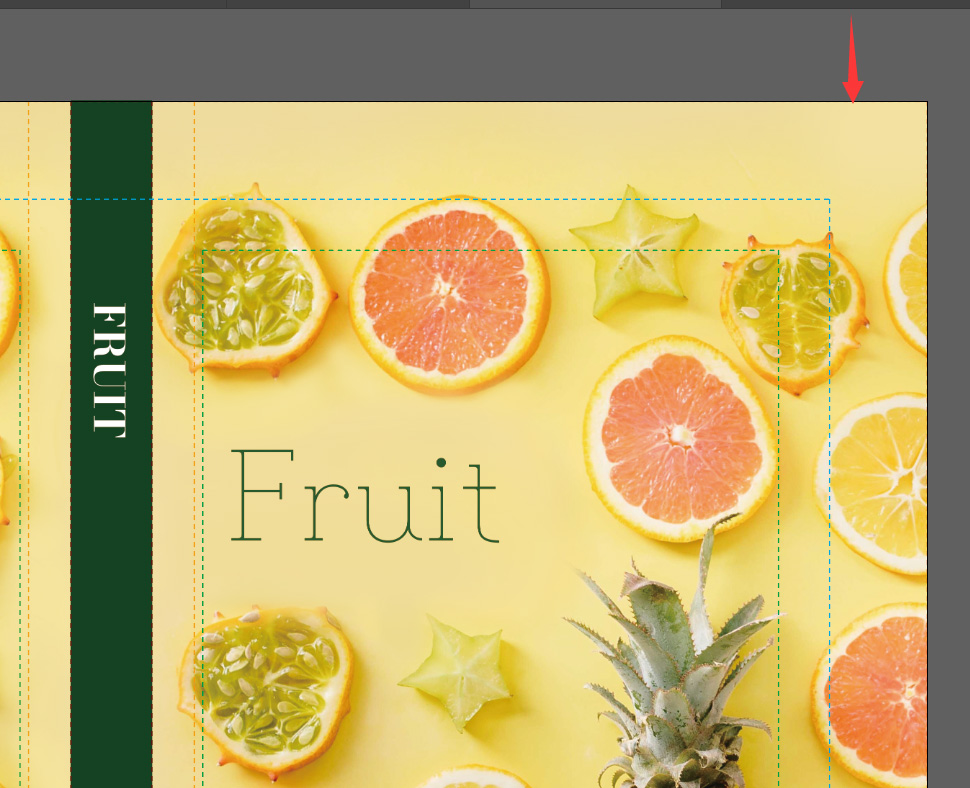
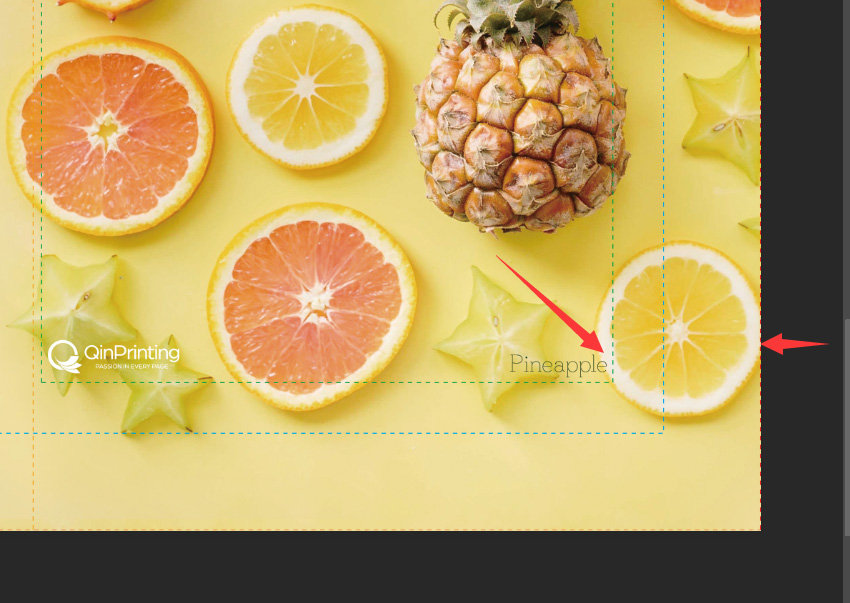
 6. After placing the template into the file, align it center. You’ll see red bleed lines, blue trim lines, green safety lines, as well as positions for book crease, spine, and wrap.
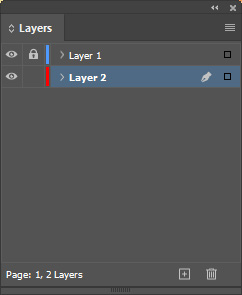
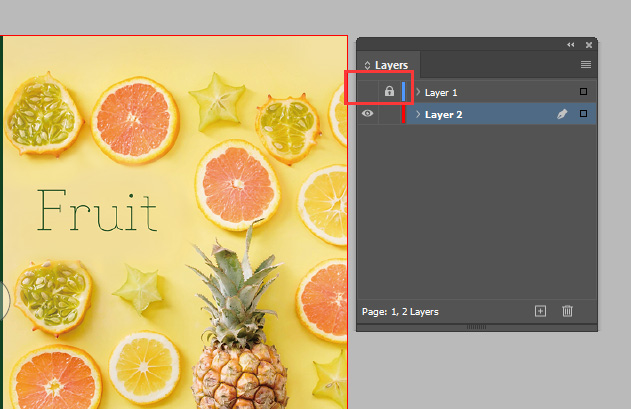
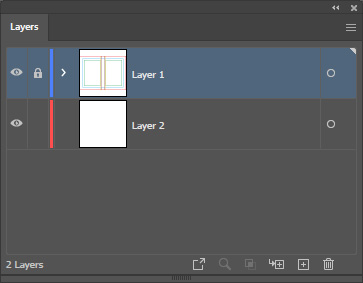
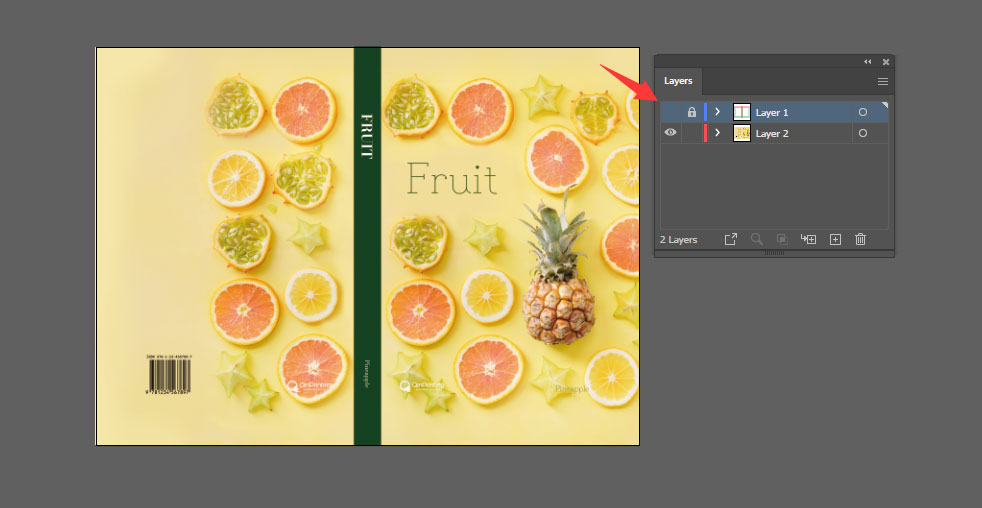
7. Lock the layer where the template is located. Then create a new layer and drag it below.
6. After placing the template into the file, align it center. You’ll see red bleed lines, blue trim lines, green safety lines, as well as positions for book crease, spine, and wrap.
7. Lock the layer where the template is located. Then create a new layer and drag it below.
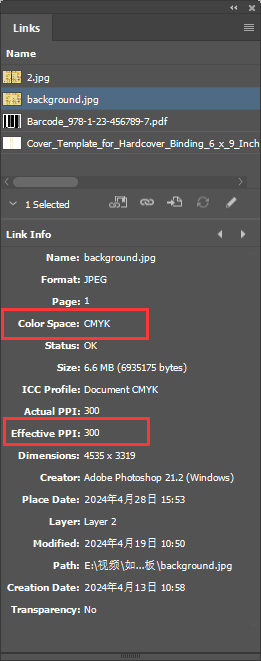
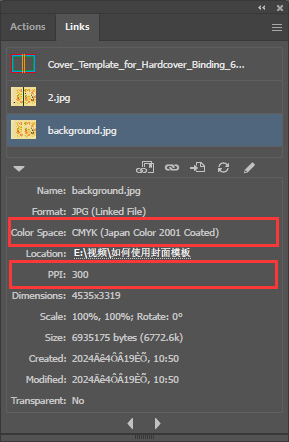
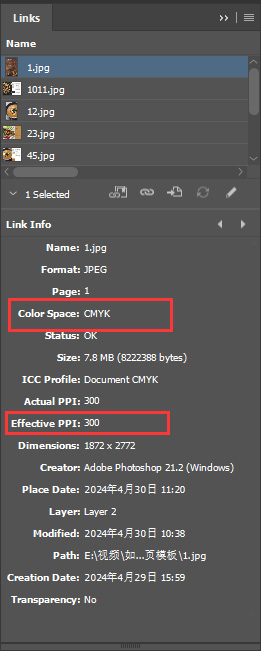
 8. Use high-resolution CMYK images for designing. You can check image details in the “Link” panel, ensuring the Effective PPI is 300.
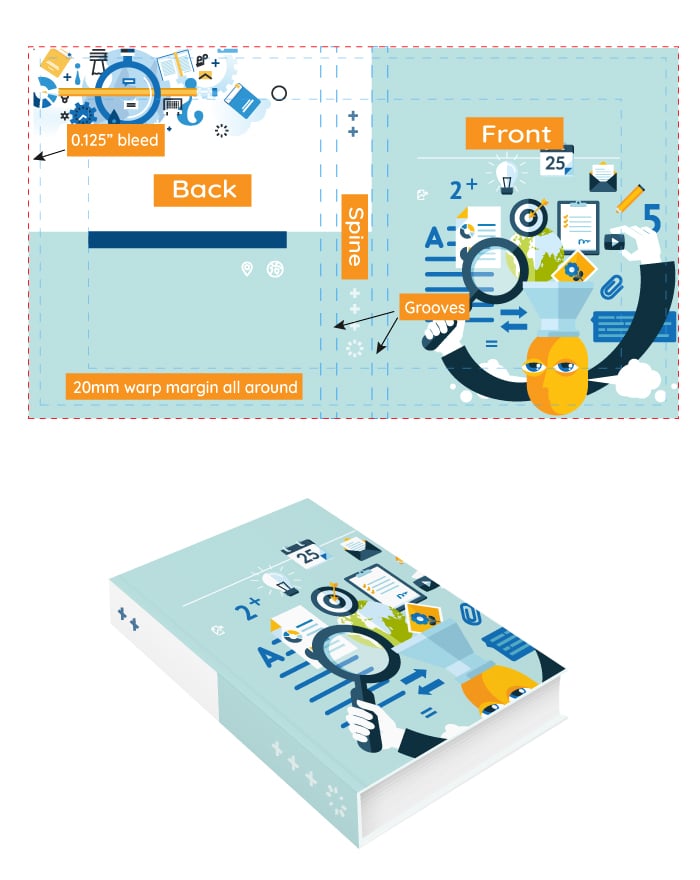
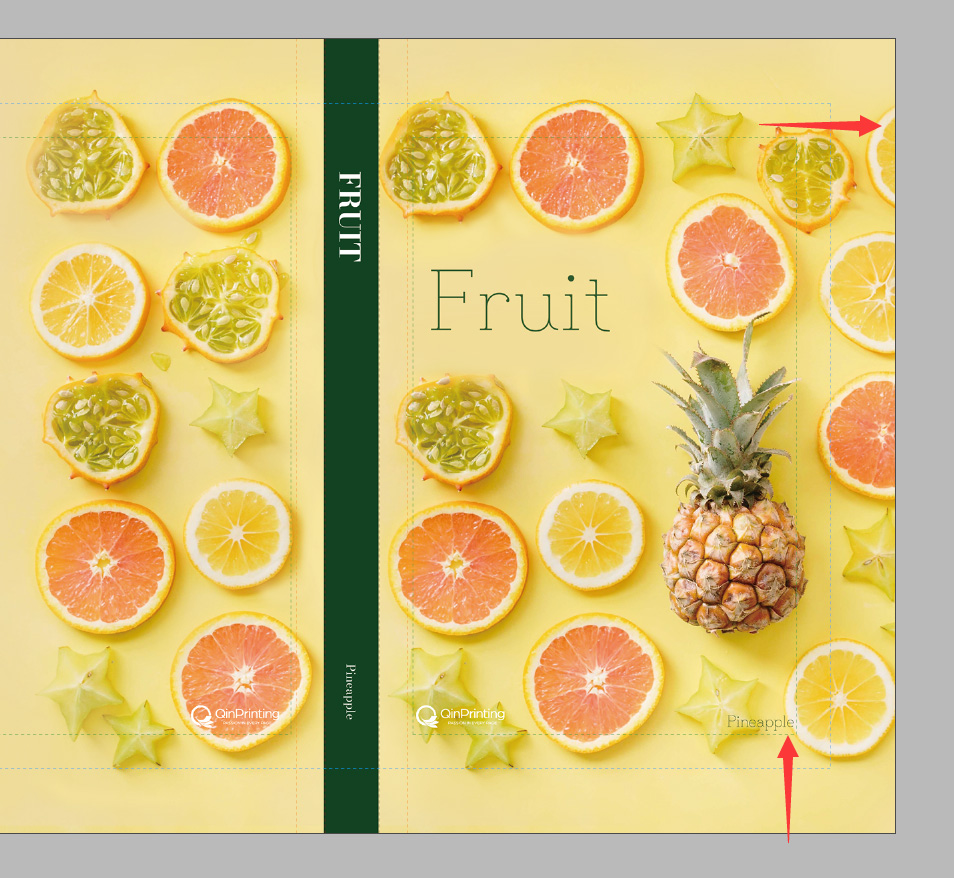
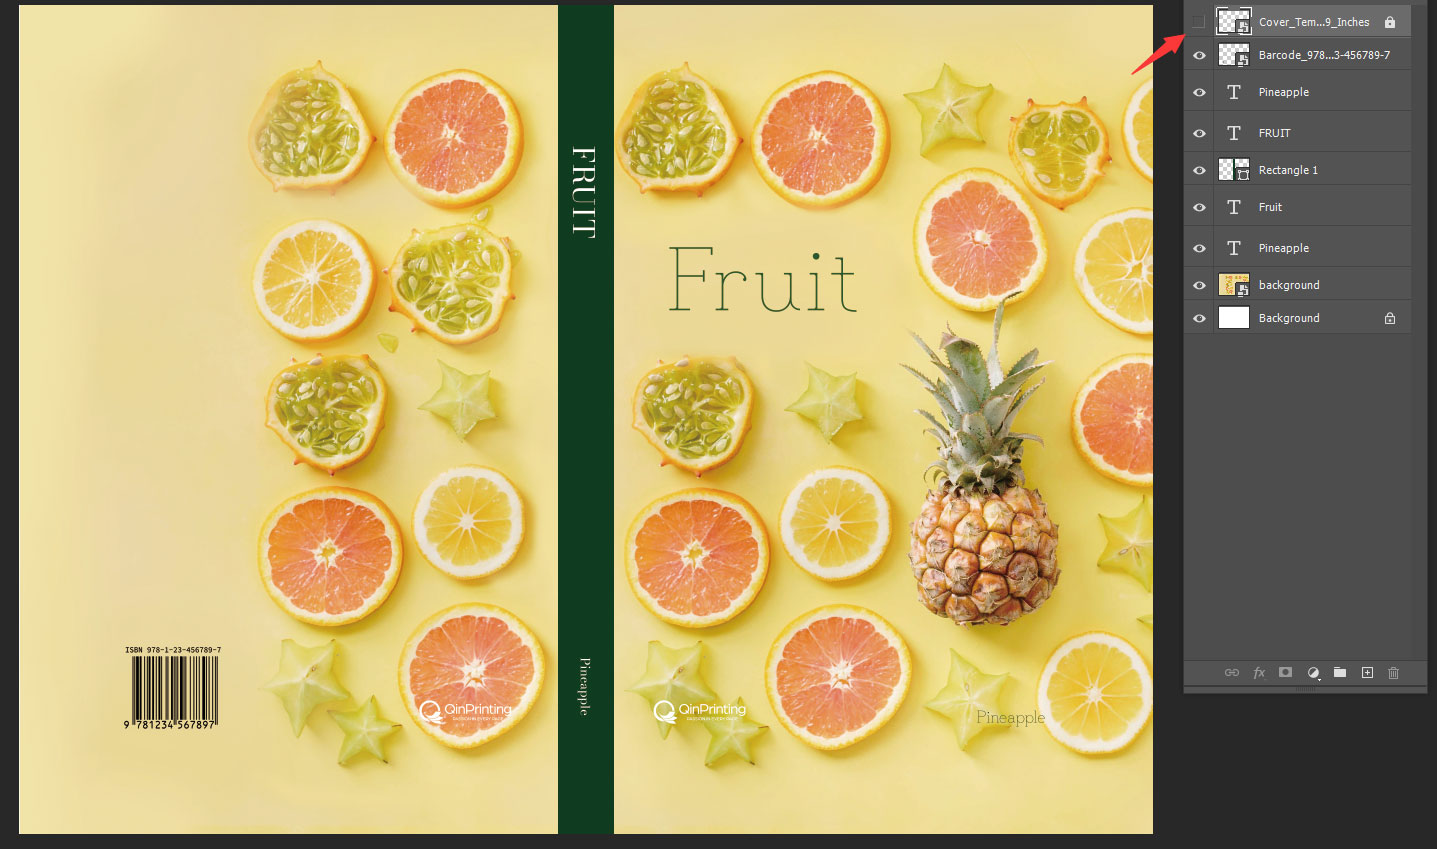
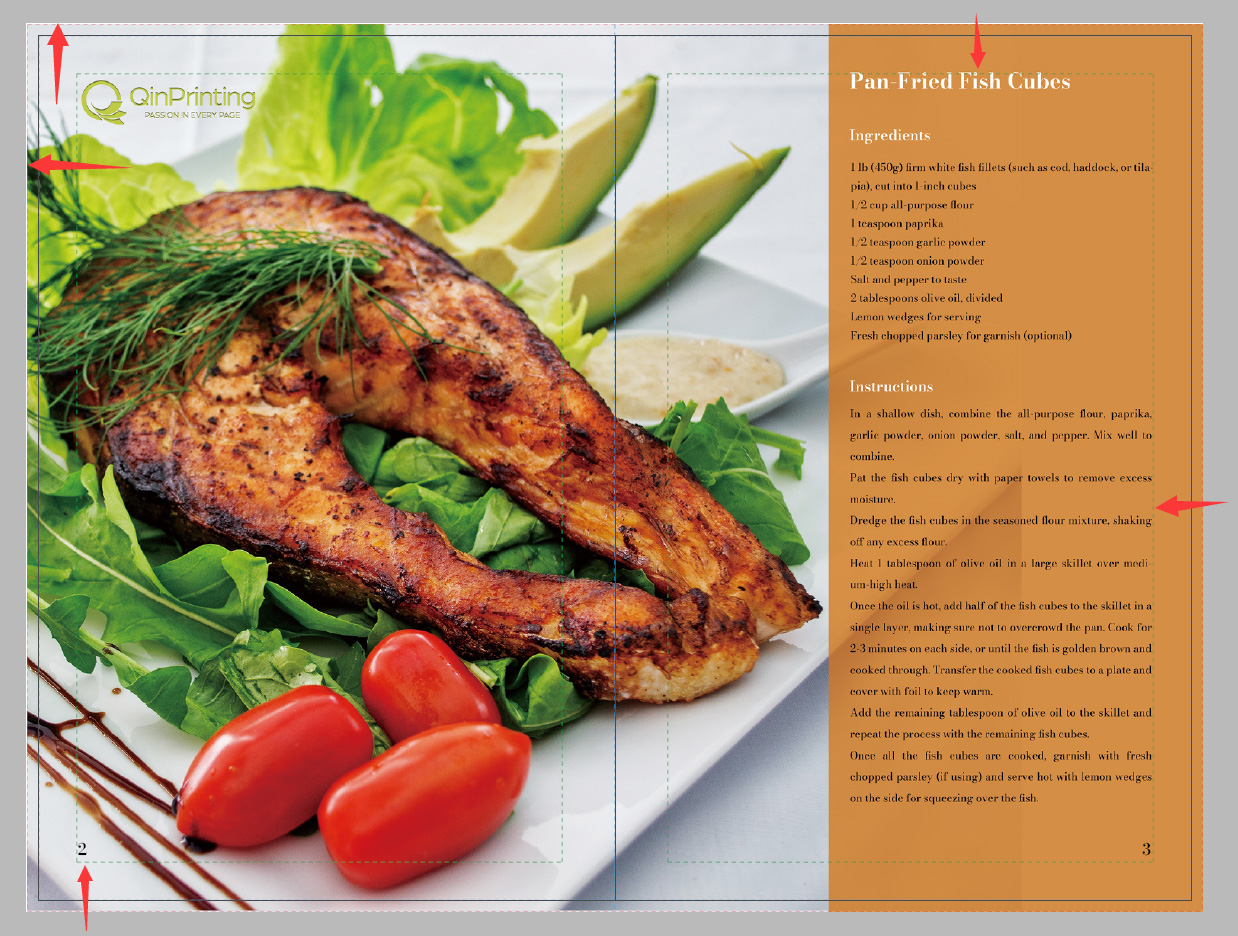
 9. Extend the background image to the position of the red bleed lines. When setting colors, use CMYK color. It’s recommended to place text and important content within the green lines.
 10. Once the design is complete, click to hide the template layer.
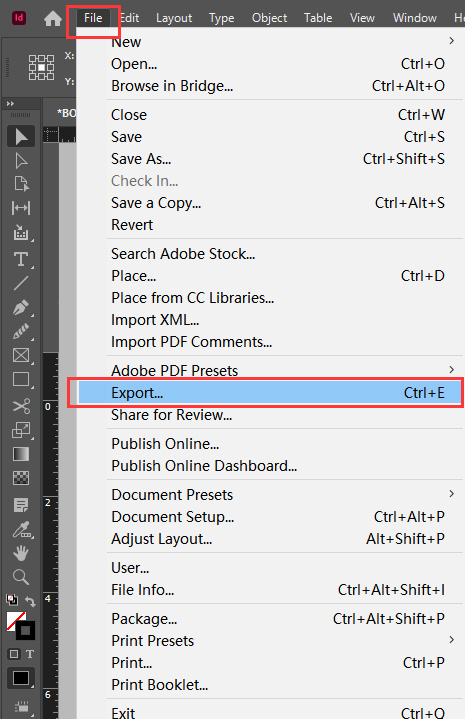
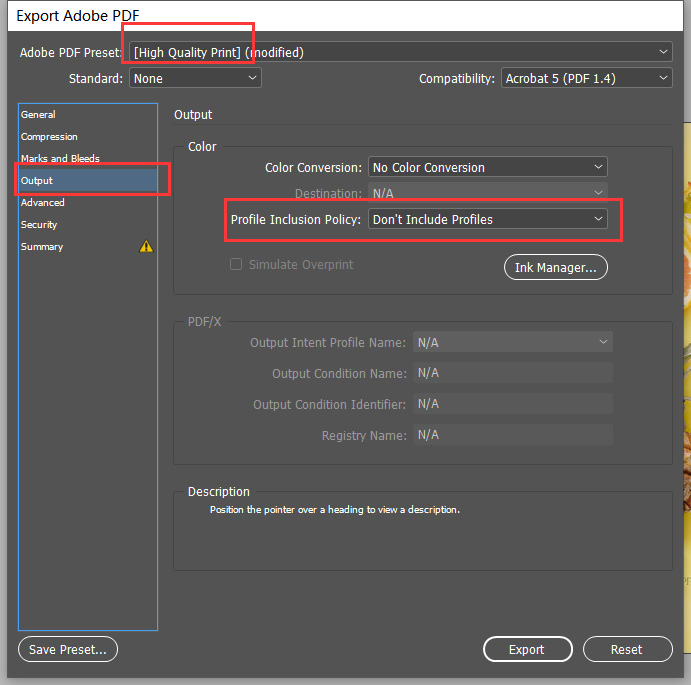
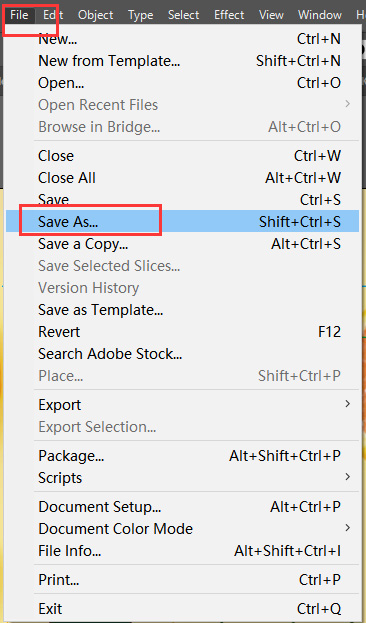
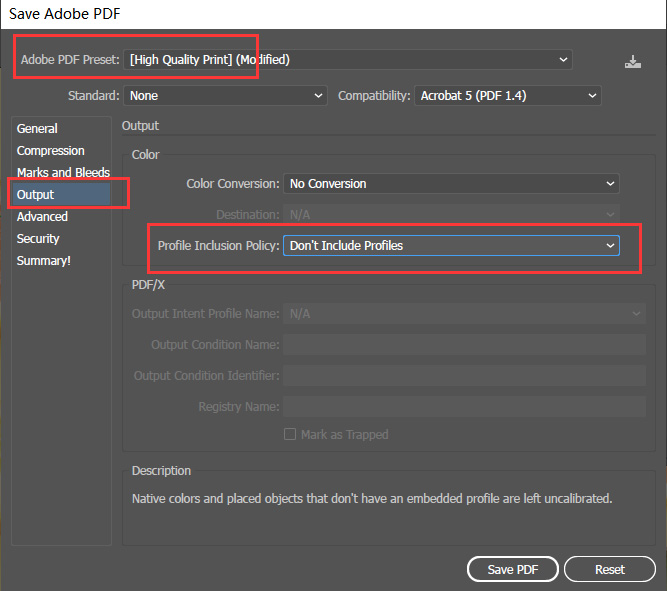
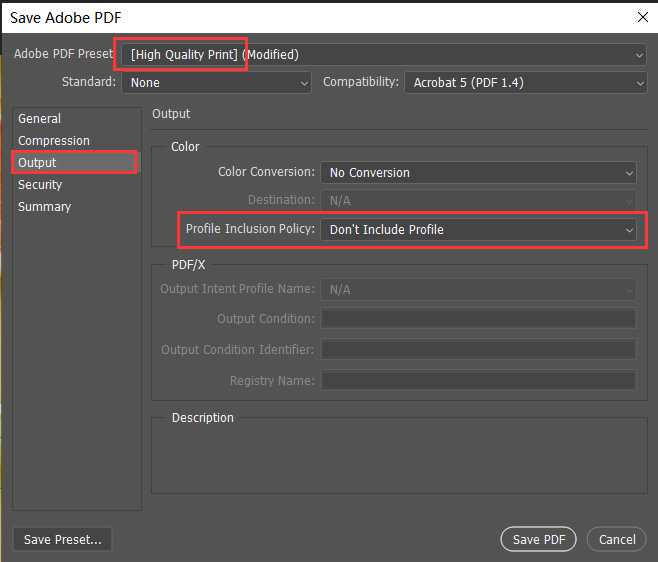
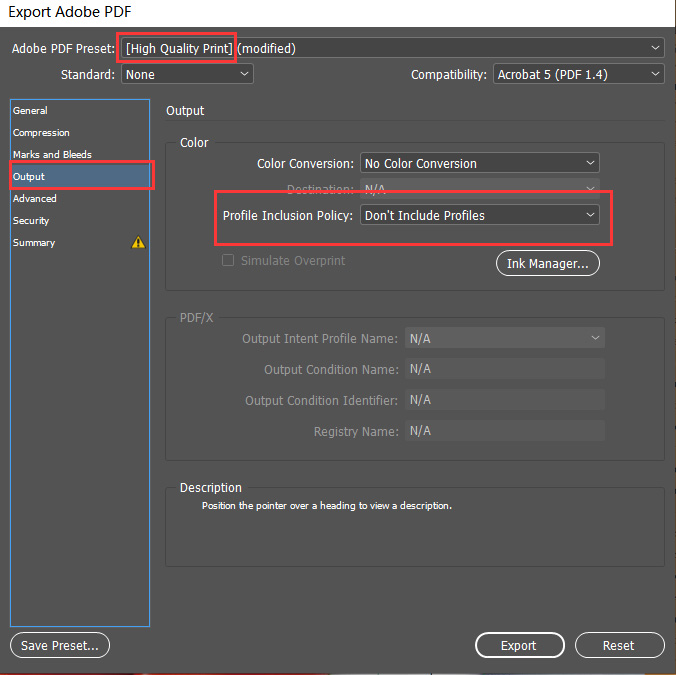
 11. Select “File”, then “Export”, and save it in Adobe PDF format. In the settings panel, choose “High Quality Print”, and under “Output” options, select “Don’t Include Profiles”.
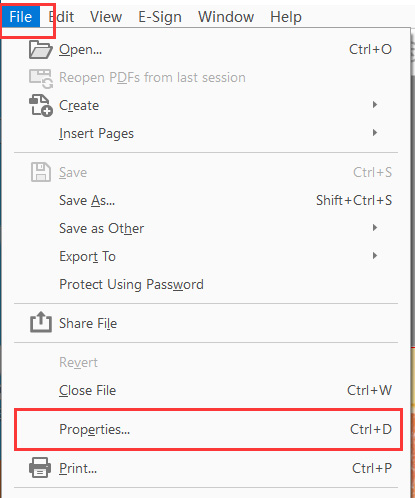
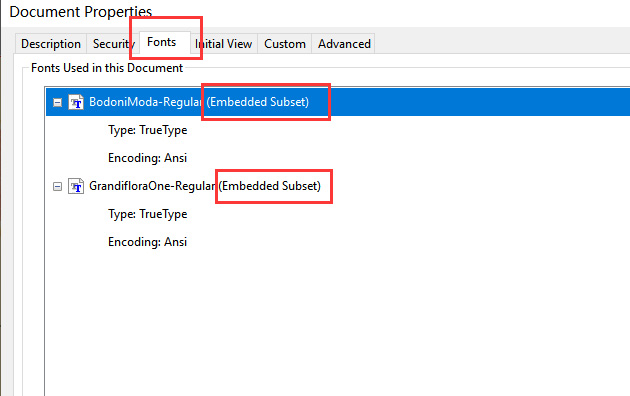
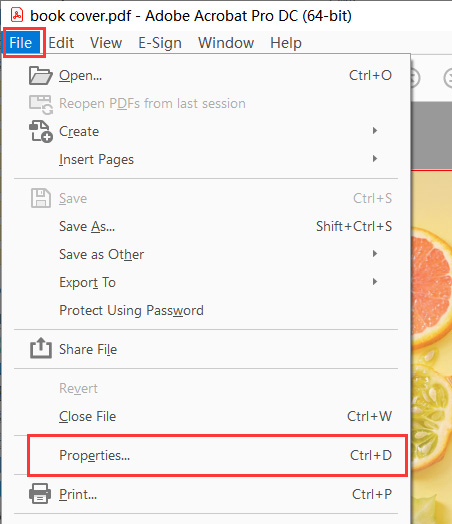
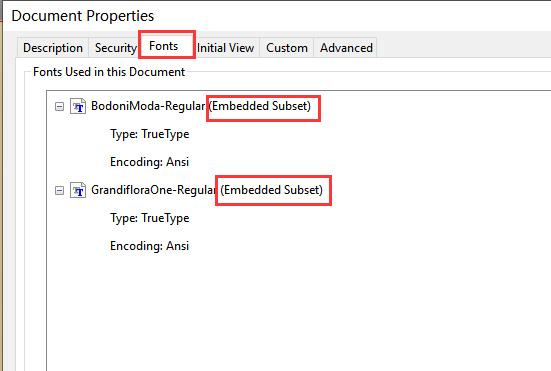
 12. Open the saved PDF, select “File” options, then “Properties”, and choose “Font”. Ensure all fonts have the “Embedded Subset” flag.
1. Download the cover template you want from the QinPrinting website.
2. Open the downloaded template in Adobe Illustrator. Select the page with only lines and choose “Import PDF pages as links for optional performance”.

3. On the newly opened page, you can see the red bleed lines, blue trim lines, green safety lines, as well as the positions of the book creases and spine.
4. Open the layers panel, lock the layer where the template is located, create a new layer, and drag it below the template layer. Design on the new layer.
5. Use high-resolution images in CMYK mode for design. Extend the background image to the position of the red bleed line. It’s recommended to place text and important content within the green lines.
6. When inserting a barcode (such as ISBN code), it is recommended to use a vector barcode.
7. After designing, click to hide the layer where the template is located.
8. Select “Save As” and save it as an Adobe PDF format. In the settings panel, choose “High Quality Print.” Under the output options, select “Don’t Include Profiles.”
9. Open the saved PDF, select “Properties” under the “File” option, then choose “Fonts” to ensure that all fonts have the “Embedded Subset” flag.
1. Download the desired cover template from the QinPrinting website.
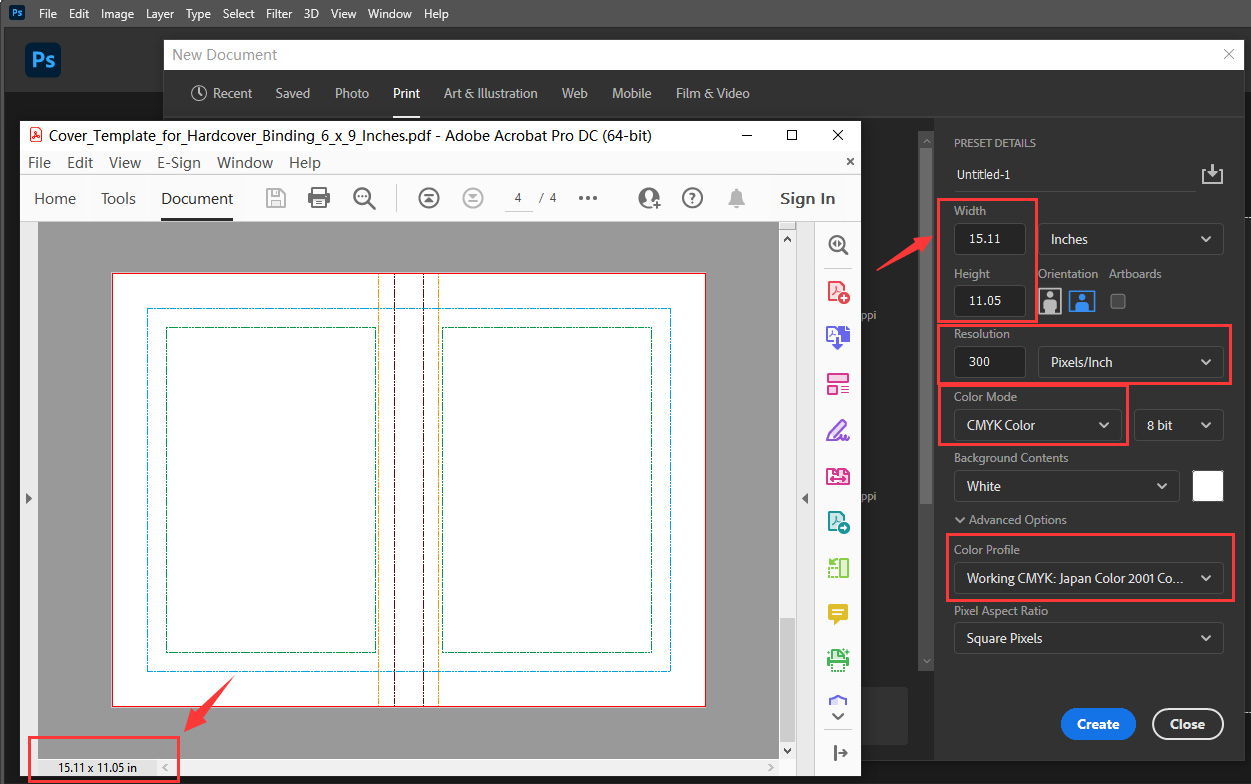
2. Open the template; the last page is the blank template we need. Note the dimensions of this page.
3. Open Adobe Photoshop, select “Create New”, and input the same dimensions as the last page of the PDF.
4. Choose 300 for Resolution, “CMYK Color” for Color mode, and “Japan Color 2001 Coated” for Color Profile.
5. In the new panel, select “File” – “Place” and choose to place the template’s last page.

6. You’ll see red bleed lines, blue trim lines, green safety lines, and positions for the book crease, spine and wrap.
7. Lock the layer with the template. Now you can start designing.
8. Use high-resolution images in CMYK mode for your design. Extend the background image to the red bleed lines. It’s recommended to place text and important content within the green lines.
9. Once the design is complete, click to hide the template layer.
10. Select “Save As” and save as “Photoshop PDF”. In the settings panel, choose “High Quality Print”, and under the output options, select “Don’t Include Profiles”.
11. Open the saved PDF, select “File” – “Properties”, then choose “Fonts” to ensure all fonts have the “Embedded Subset” symbol.
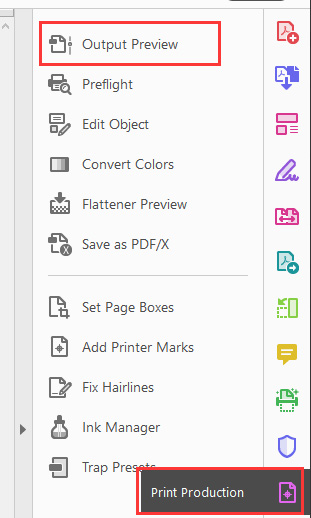
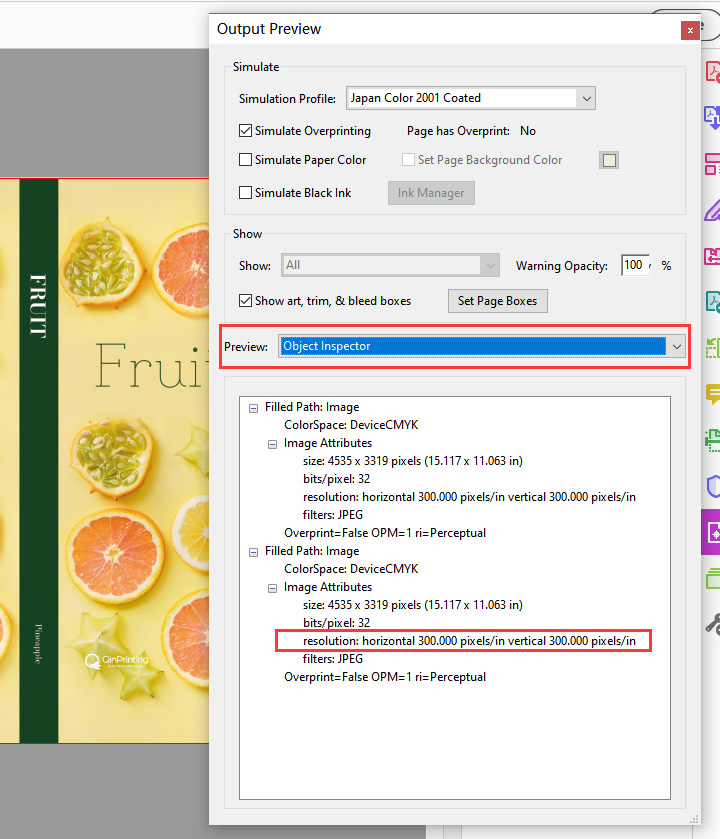
12. To check image resolution, click “Print Production” – “Output Preview”. Under “Preview”, select “Object Inspector”. Click on images to view their resolution. It’s recommended images have a resolution of 300 dpi.
1. Download the required template from the QinPrinting website.
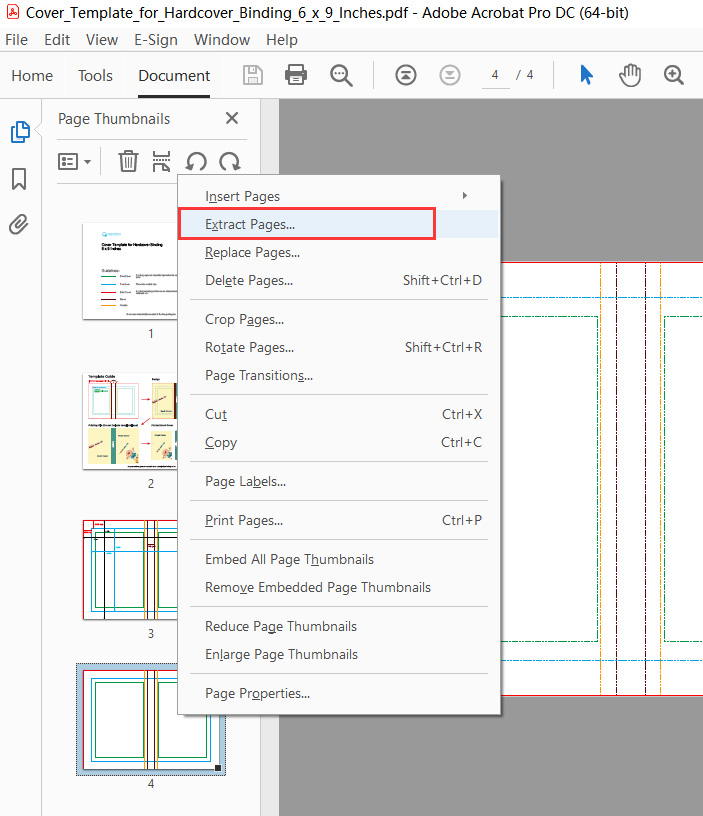
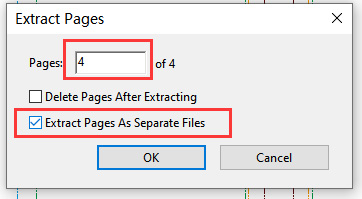
2. Open the template using Adobe Acrobat, go to the sidebar, select the page with only lines, right-click, and choose “Extract Pages” to extract it as a separate file.
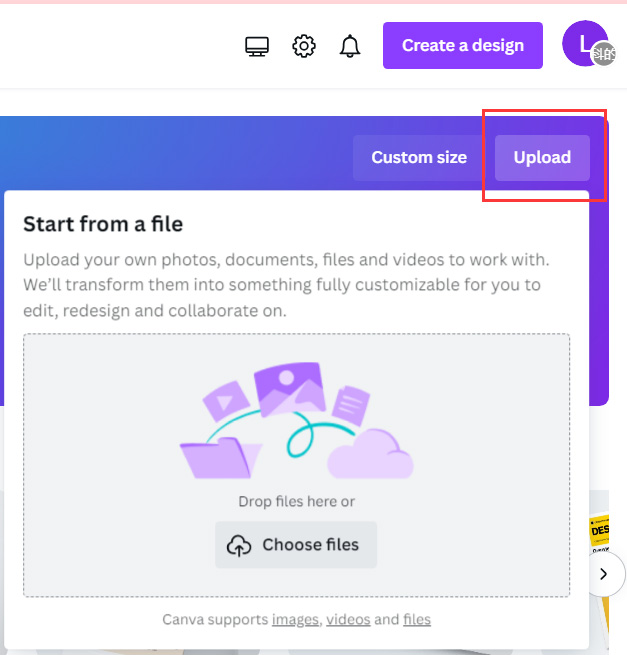
3. Open Canva, click “Upload”, and upload the extracted PDF.
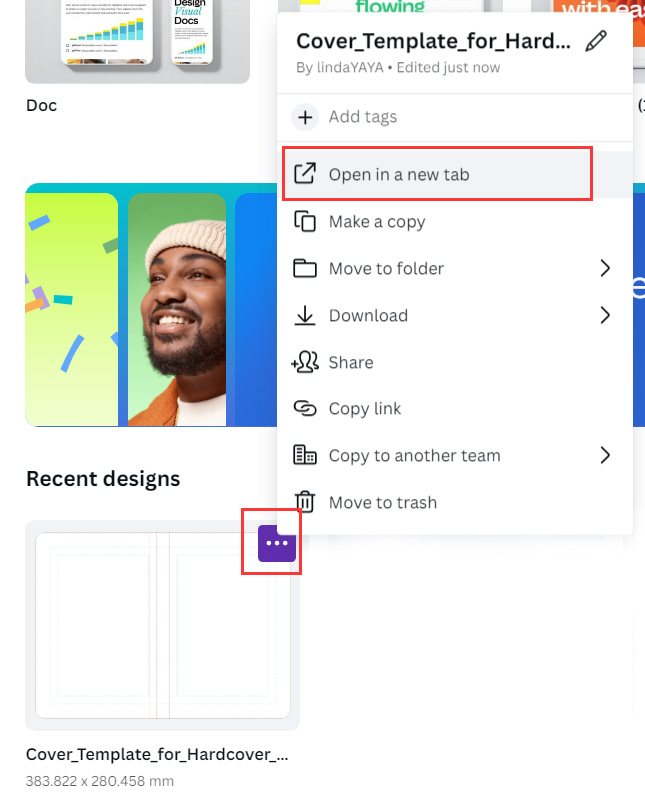
4. You’ll find the recently uploaded template in recent designs. Click the three dots in the top right corner and select “Open in a New Tab”.
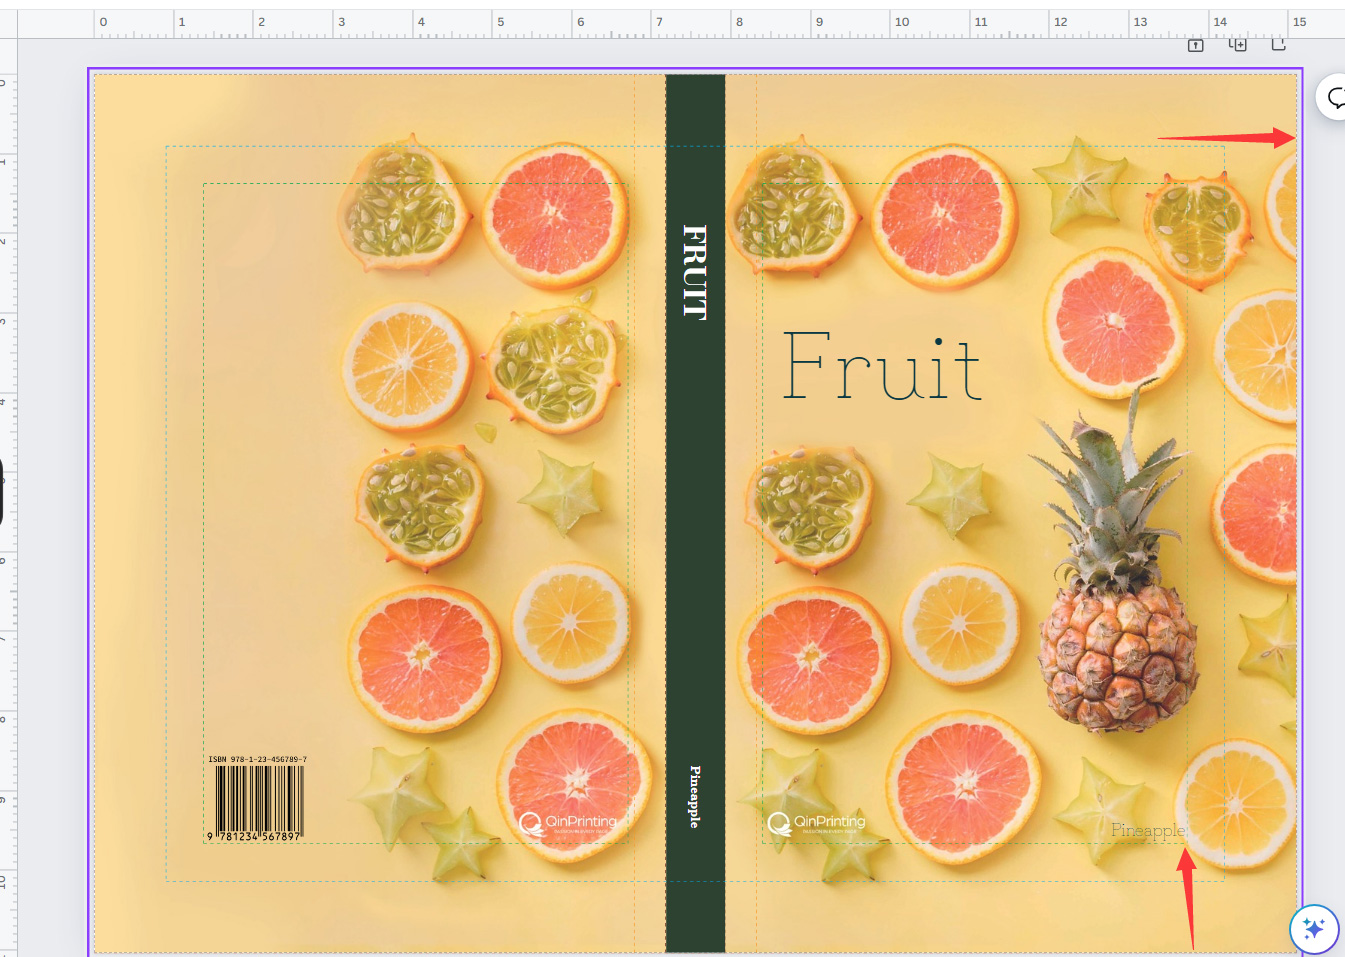
5. In the newly opened page, you’ll see red bleed lines, blue trim lines, green safety lines, as well as book spine, crease, and wrap.
6. If you want to switch from millimeters to inches, select “Resize & Magic Switch”, then “Custom size”, change the unit to inches, check the box, and click “Continue”, then “Resize this design”.
7. During design, click ‘Position’ to place the layer with the template on top and lock it.
8. Design using high-resolution images in CMYK mode. Extend the background image to the red bleed lines. It is recommended to put all important content within the green safety line
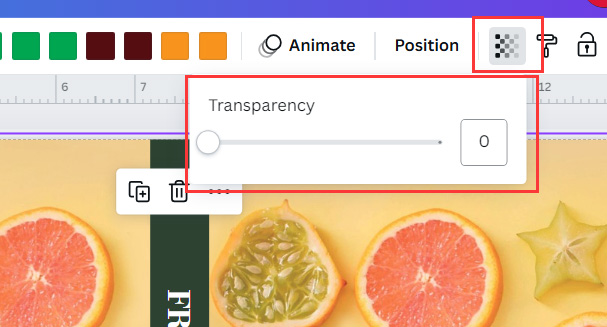
9. After finishing the design, unlock the template layer and adjust the transparency to 0.
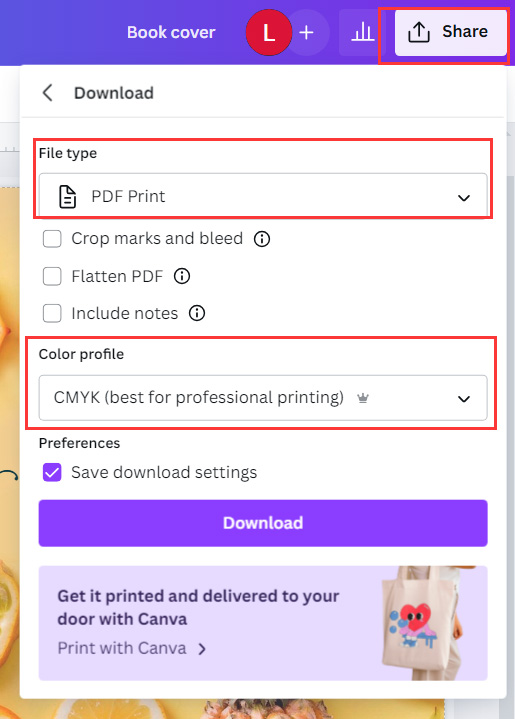
10. Click “Share”, and “Download”, choose “PDF print”, do not check “crop marks and bleed”, and select the “CMYK color profile”.
11. Open the saved PDF, go to “File” – “Properties”, then select “Fonts” to ensure all fonts have the “Embedded Subset” flag.
1. Download the inner page template you want from the QinPrinting website.
2. You’ll see a single-page template for the right page, a spread page template, and a single-page template for the left page.
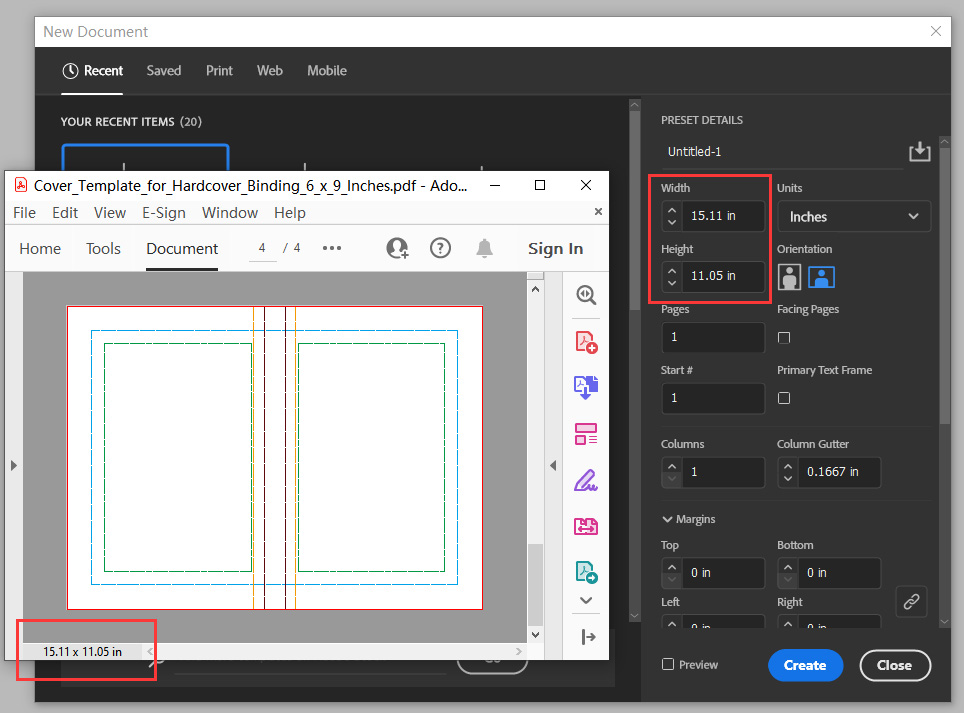
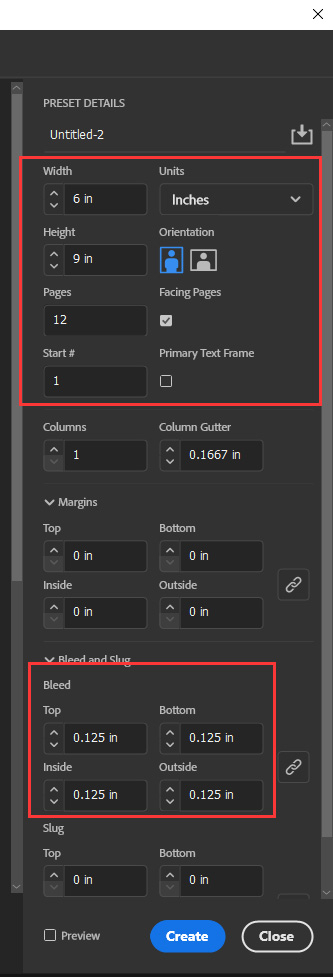
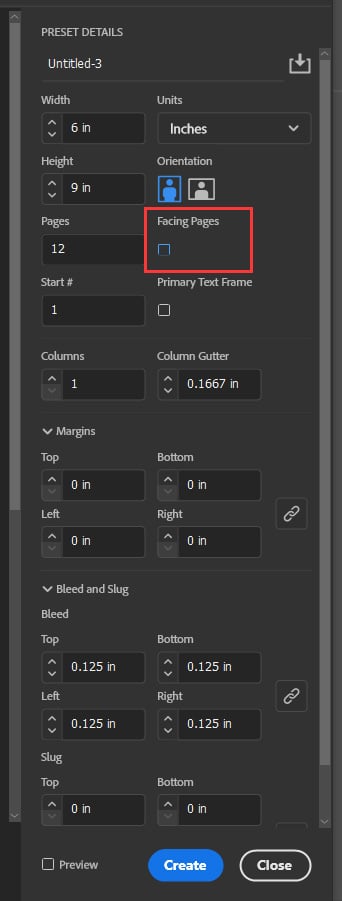
3. Open Adobe InDesign, input the size and number of pages, select “Facing Pages”, and set the bleed to 0.125 inches.
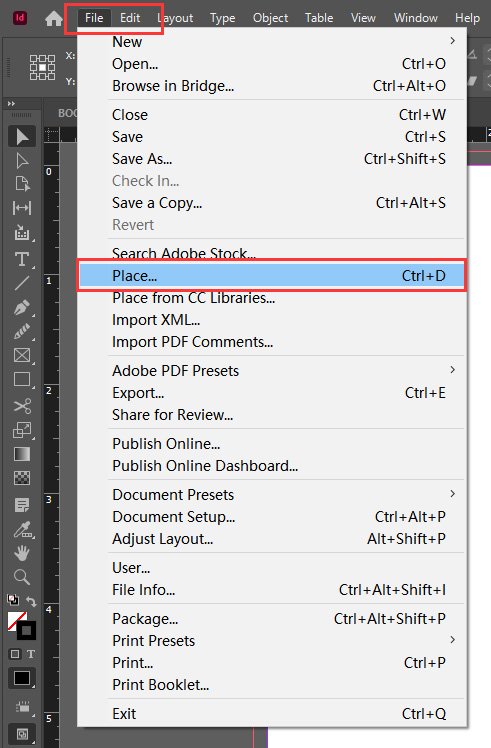
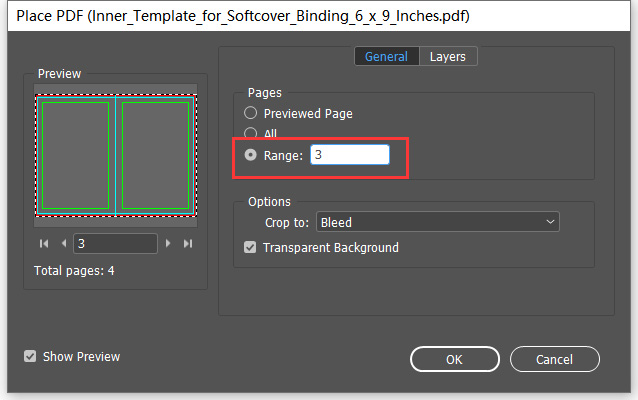
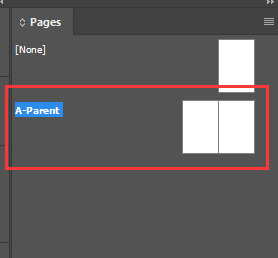
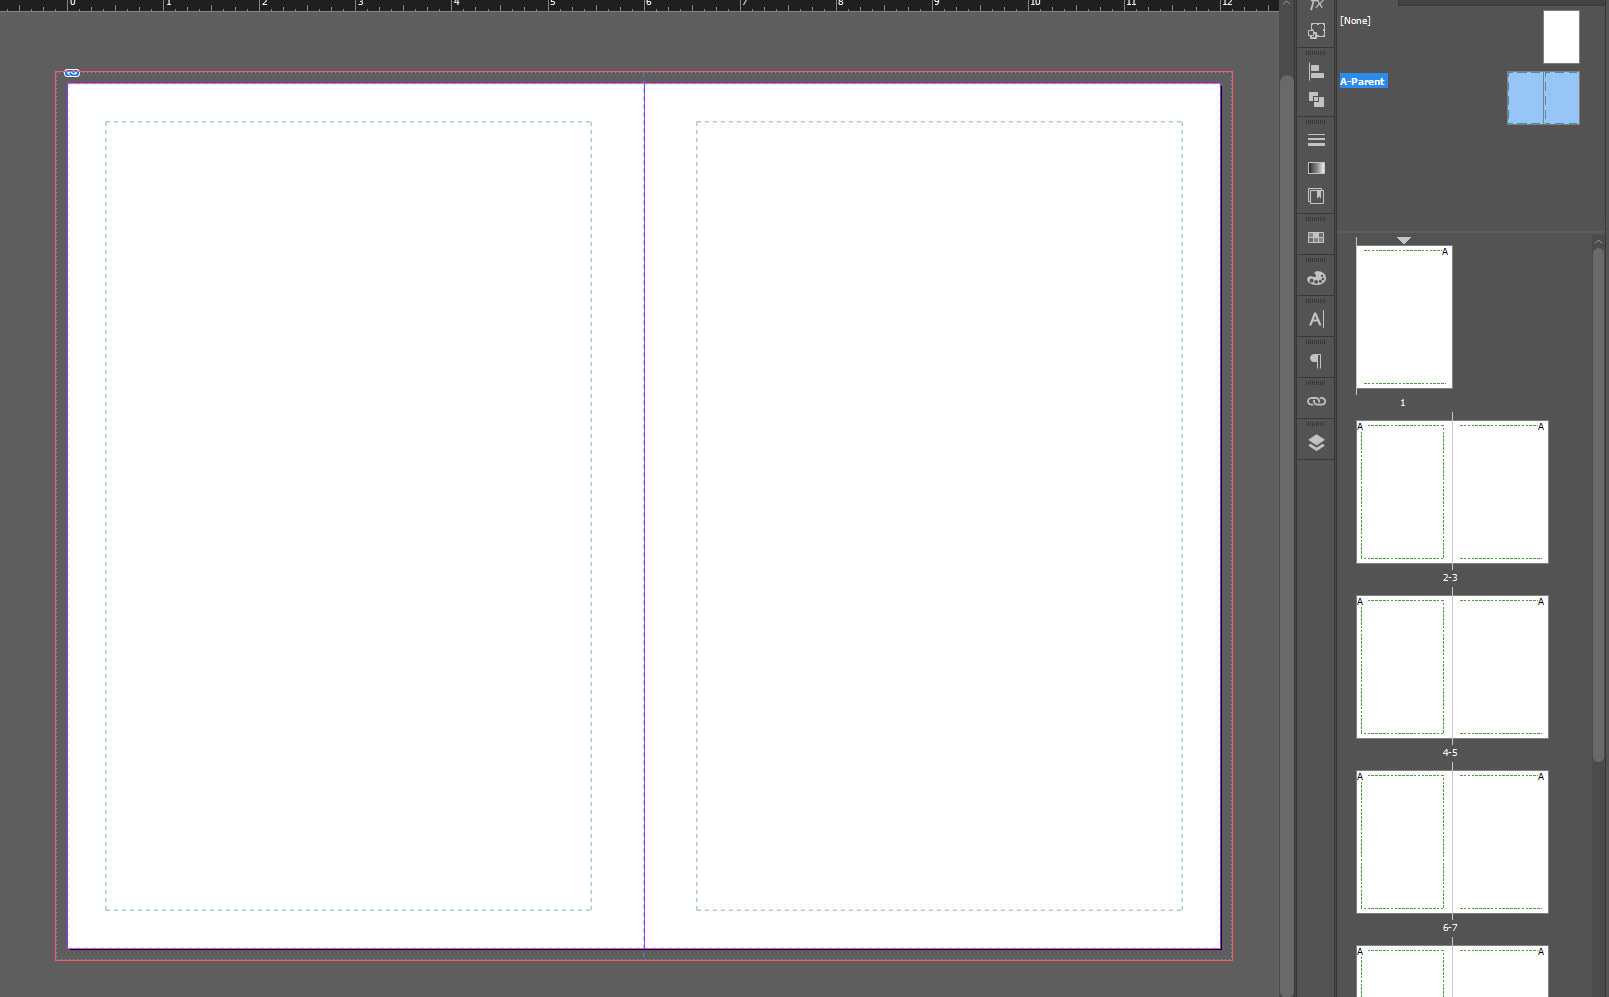
4. In the new document, in the pages panel, select “A-Parent”. Choose “File” and then “Place”, select the PDF you just downloaded, and input “3” in the range. Center the placed PDF. You’ll see all pages displaying red bleed lines, blue trim lines, and green safety lines.
5. If you don’t want to use facing pages for design or if you’ve downloaded a book that can’t be set as facing pages, like wire-o or spiral binding books, where all three pages in the template are separate page templates, you can set up InDesign as follows:
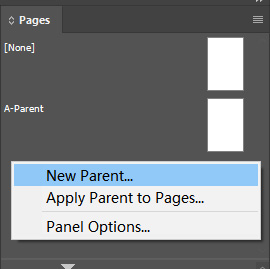
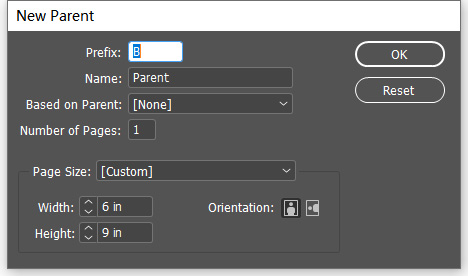
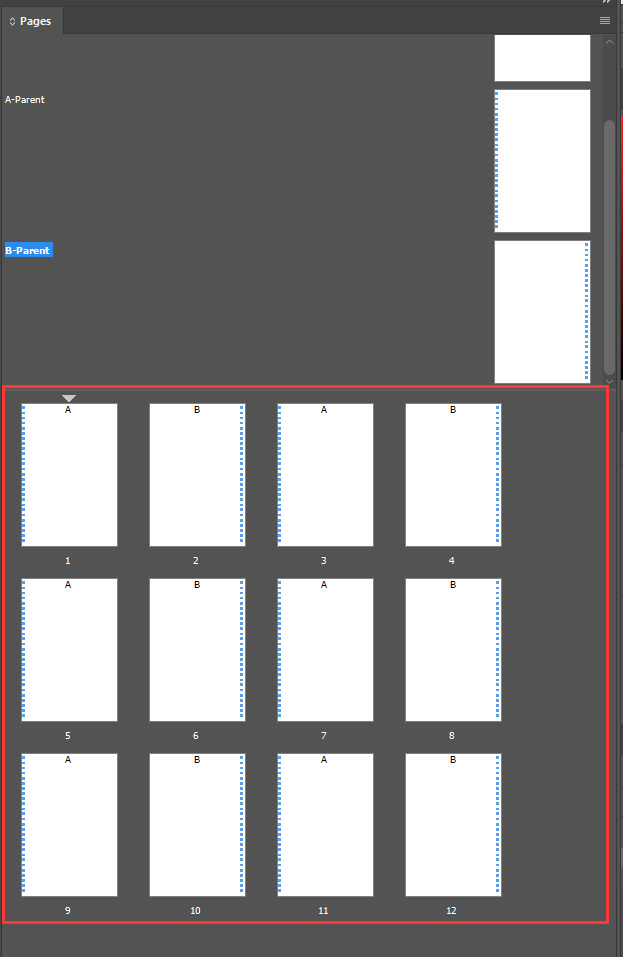
6. In the New Document setting, don’t select “facing pages”. Then, in the new document, create a new parent called “B-parent”.
7. On A-parent, place the PDF template for the second page, and on B-parent, place the PDF template for the third page. You’ll see all pages are the same as A-parent.

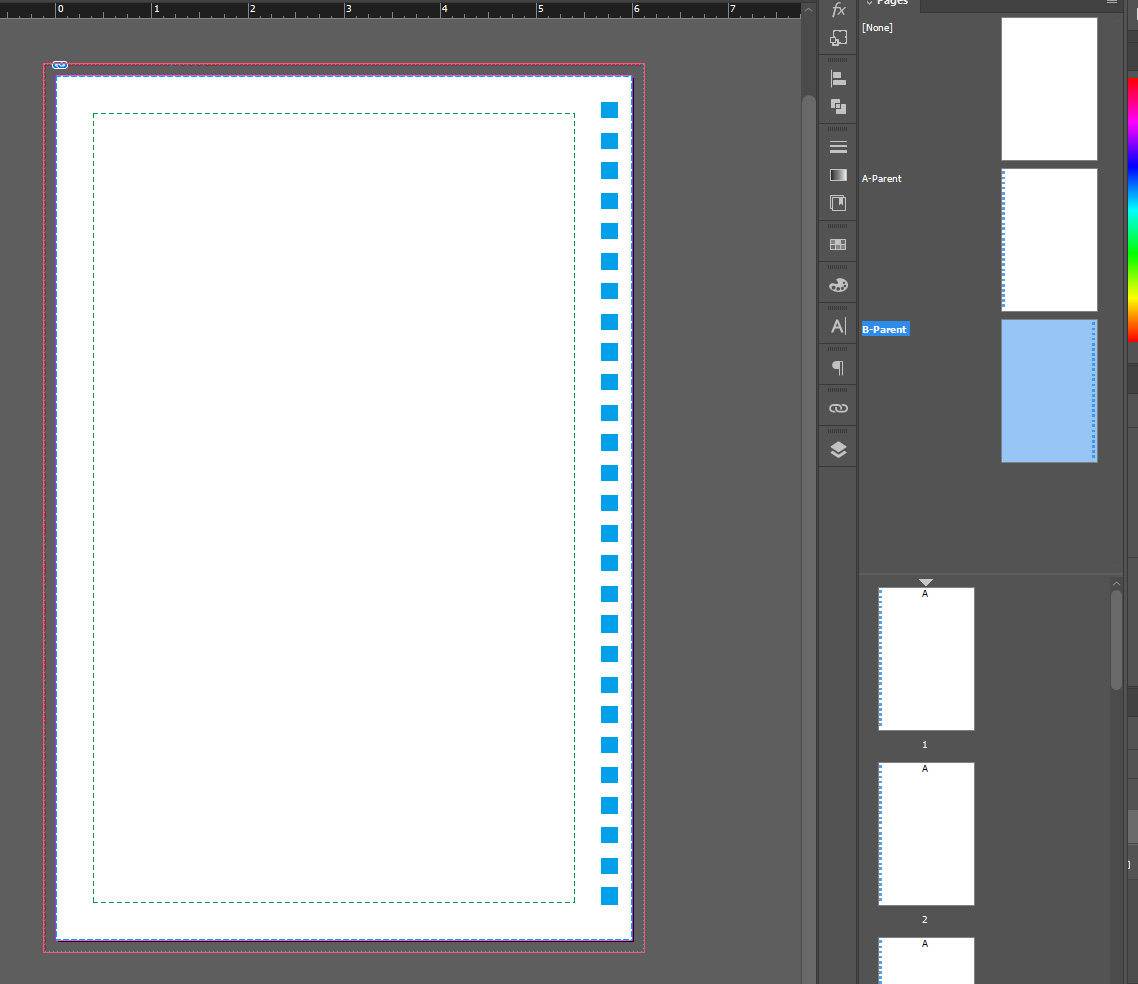
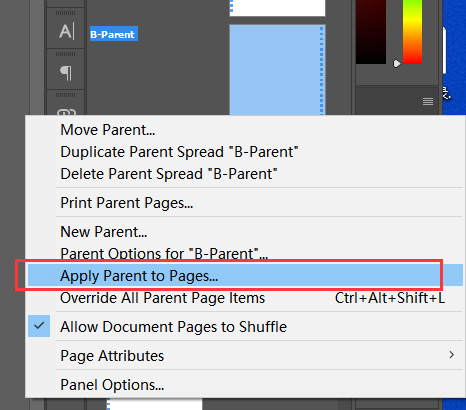
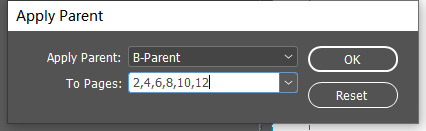
8. Now Right-click B-parent, choose “Apply Parent to Pages”, and input all even page numbers in “to pages”. Now all even pages are the same as B-parent.
9. When designing, ensure images are in CMYK mode and have an effective PPI of 300. You can find information about images in the Links panel.
10. It’s recommended to place all important content within the green safety line. Extend the background image to the red bleed line. When setting colors, use CMYK mode.
11. After designing, hide the layer containing the template.
12. Choose “File” and then “Export”, save as Adobe PDF format.
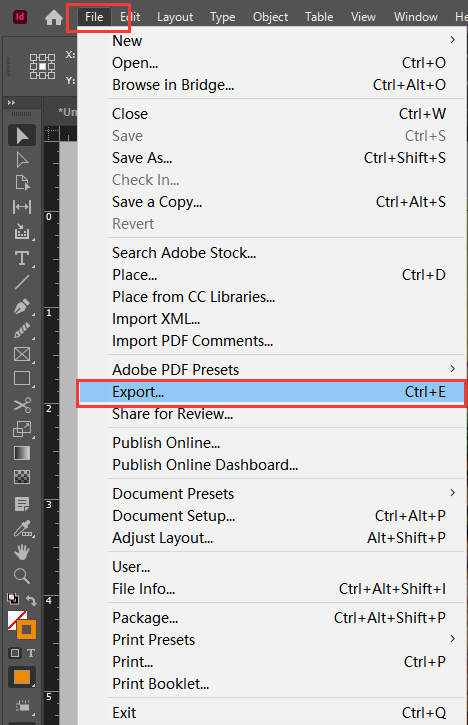
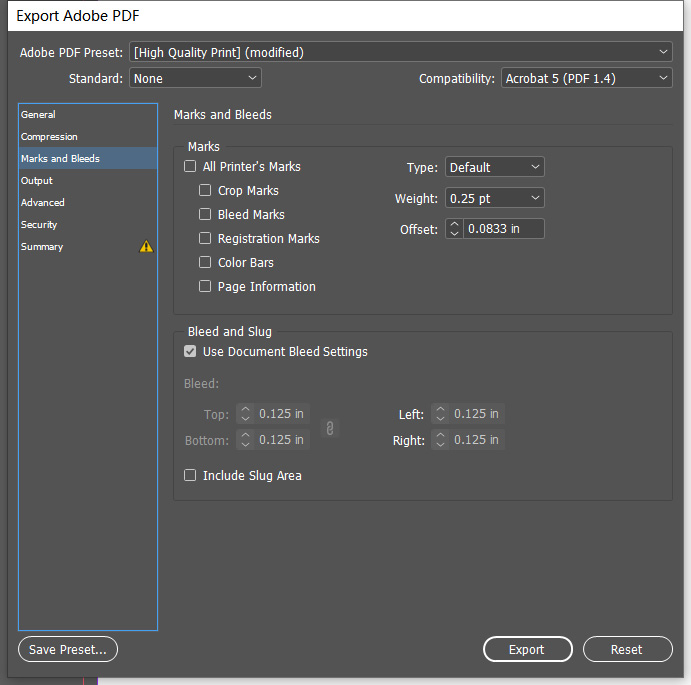
13. In the settings panel, select “High Quality Print”. Under “Marks and Bleeds”, choose “Use Document Bleed Settings”. Under “Output”, select “Don’t Include Profiles”.
14. Open the saved PDF, choose “File”, then “Properties”, then “Fonts”. Ensure all fonts have the “Embedded Subset” symbol.